When it comes to contouring, it can get overwhelming, from finding the right contour shade, product, and blending brush, to highlight, concealer, etc. But once you have that figured out, The contour makeup how-to is hard to miss. Typically, it starts with a freshly cleansed face that’s then brushed with a medley of colors—as if they’re deciding on which color to repaint the living room. But, with a little blending, brushing, and dabbing, their face transfigures, leaving only a chiseled jaw and high cheekbones in its place.
So, how does one transform an Etch-A-Sketch face into a contouring masterpiece? It’s simple: Master the art of blending.
In this step-by-step guide, we’ll break down how to blend contour makeup so you can integrate elevated makeup looks into your daily routine with seamlessness, grace, and a minimal amount of products.
Step 1: Choose Your Palette
The first step in nailing your contouring game is to choose the right products. Then it’s time to learn how to use them.
To that end, there are two key elements of impeccable contouring:
- The shadow – It’s the shadow of your contour palette that brings your face’s bone structure into full relief. Opt for shadow shades that are one to two shades darker than your natural shade (the closer to your skin tone, the easier it will be to blend).
- The highlight – Contouring highlights give the illusion of bringing more light to the facial features you want to stand out most. Choose a highlighter or foundation stick that’s one shade lighter than your skin tone for a subtle highlight and up to two tones lighter for a bit more drama.
Before choosing your contouring products, remember that the hue of some formulas may look different on the skin once it’s set. To get the right shade, look for sheer, buildable formulas that give you maximum control over placement and pigmentation.
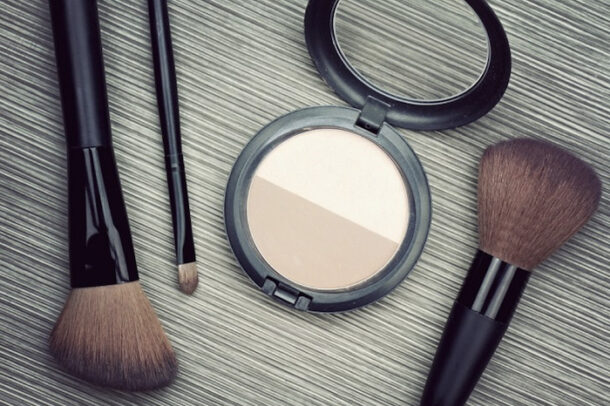
When it comes to products, there are various options from powder contour to cream and stick. Choosing the right contouring product is important to how you like your makeup finish. This can include finding the best foundation sticks for your skin or using a powder contouring product over cream.
Step 2: Prep Your Canvas
The next step is to prime your face for contouring. Prepping your skin makes a difference in how your makeup lays on top of it. So whether you have oily skin or dry, make sure it is appropriately prepped for makeup. To do this, Start with clean, moisturized skin and use a makeup primer if the weather is warm or if your skin tends to be on the oily side.
As for when to apply foundation? It’s up to you. Applying foundation before you contour will create a more dramatic, photo-ready effect while adding this step after will tone down the definition. With medium to high-coverage contour sticks, you may be able to forgo foundation altogether—and take some stress off your skin in the process.
Step 3: Apply Strategically
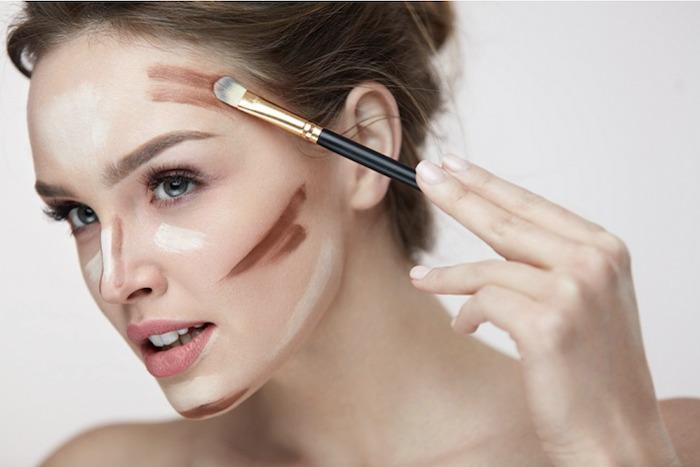
Once you’ve applied your foundation, it’s time to start painting your canvas with an array of colors. When contouring, there are two common strategies to work with to add definition to the face:
- Shading – The temples, cheekbones, and jawline tend to be the most pronounced areas of facial architecture. Apply your shadow color beneath these regions to frame your face and lend more structure. Make sure to draw some contour below the jawline and blend down the sides of your neck!
- Highlighting – Light tends to hit the brow bone, cheekbone, and chin first, which makes them go-to regions of the face to illuminate. Concentrate highlighter near the center of the face to mimic the sites where sunlight normally falls.
If you’re worried about where to first place product , start with your cheeks. With maximum surface area, you’ll have plenty of room to experiment with shading, make mistakes, and correct them before zeroing in on finer regions of the face. You can play around with shading your or even add some blush and bronzer to tie it all together.
Remember: Every face is built differently. Before you apply, consider which features you want to enhance, and then focus your application there.
Step 4: Get Handsy
The single most important factor in executing contour makeup is to blend as you go.
Whether you’re going for a full contour look or soft-sculpting your way to modelesque cheekbones, cream contour sticks are ideal for their workability. Beneath the natural warmth of your fingertip, they enable you to distribute, concentrate, and feather out pigment on your terms (rather than your makeup brushes).
Remember to check your progress under different light conditions. If it looks like you aren’t making progress in your vanity mirror, head to a room with natural light to check your results.
And don’t forget to blend, blend, blend, whether it’s with a contour brush or your fingertips so there’s not a visible, harsh contour line from your stick or powder.
Step 5: Prepare For Touch-Ups
When we work with precisely applied makeup like contouring, it’s essential to have the right tools available to keep it from wandering out of bounds. Contour sticks and other stick beauty poducts are ideal for reducing the number of tools you need to get it right.
If you’re wondering how to use a contour stick, it’s (fortunately) a lot simpler than breaking out your makeup brush set and readying your palette of shadow and highlighting powders. The three-step process goes as follows:
- Lightly swipe on your shadow or highlight to the selected region
- Blend out the pigment using your fingertips
- Layer and build (with natural light-checks in between) for your desired look
One perk of contour sticks is that they make touch-ups accessible on the go. Even if all you’re bringing with you is your tiniest ‘90s-inspired handbag, just toss in your magic contour bullet, and you’re set for the night!
Powder vs. Cream Contour: What’s The Difference?
Powders and heavy-duty foundations were all the rage when contouring first took the beauty world by a storm, but the future of this trend lies in more user-friendly, versatile formulas.
Contouring sticks have modernized this beauty trend, making for fool-proof applications and endlessly more wearable results. Here’s how to use contour stick properly:
- Blendable – Creamy contouring sticks give you more control over product distribution, allowing you to refine your contour gradient for a subtler look, or build up the pigment to ramp up the drama.
- Portable – The key to contouring isn’t just where you place the product—it’s also about ensuring your makeup doesn’t budge when it lands there. Contour sticks are a grab-and-go solution to toss in your bag for touch-ups to keep your look intact.
- Minimal – Contour powder needs a brush—at times, a whole battery of brushes—to put the product in its proper place. Not only does this drive up the price you’ll pay to get the look, but it also means you’ll spend more time cleaning your tools and generating waste—which is not exactly eco-friendly.
So, contour sticks, are they worth it? If you’re looking to bring warmth, definition, and a little more pop to your everyday look, we highly recommend giving them a try.
Try Beauty Trends On Your Terms With FabFitFun
Wondering how to choose the right contour stick in a sea of makeup products? We can help with that—and your other contouring needs, too. From finding the best makeup shades for fair skin tones to the best contour finish, we’ve got you covered.
With FabFitFun, you’ll get quarterly shipments of deluxe, full-sized products, from an incredible assortment curated by our team. Customize each box before deliveries with beauty, skincare, wellness, and more, depending on what you’re dying to try this season.
To enroll and stay up-to-date on the latest beauty trends hitting the web, visit FabFitFun.com.
Sources:
The New York Times. Contouring Is Back. It’s Not What You Remember. https://www.nytimes.com/2022/01/13/style/contouring.html
Vogue. Why ‘Soft Sculpting’ Is the New Contouring—And How to Get the Look. https://www.vogue.com/article/natural-contour-soft-sculpting-foundation-blush-highlighter-tips

